Ever tried slapping a rigid solar panel on your kayak, RV roof, or vintage camper—only to hear that sickening *crack* as it bows under pressure? Yeah, me too. Last summer, I watched $400 worth of “durable” monocrystalline glass shatter during a cross-country road trip because I didn’t realize flexible panels demand a whole different mounting philosophy.
If you’re here, you already know rigid panels won’t cut it for curved surfaces, weight-sensitive builds, or portable off-grid setups. What you don’t know—and what most blogs gloss over—is exactly **how to mount a versatile flexible panel** without voiding its warranty, frying its cells, or turning your roof into a floppy solar pancake.
In this guide, you’ll get:
- The real reason most DIY flexible panel mounts fail (hint: it’s not just glue)
- Step-by-step mounting methods tested on actual vehicles and boats
- Brutally honest advice about adhesives, heat traps, and frameless pitfalls
- Real-world case studies from my own van build + verified user installs
Table of Contents
- Why Mounting Flexible Panels Is Trickier Than It Looks
- Step-by-Step: How to Mount a Versatile Flexible Panel
- 5 Pro Tips to Avoid Meltdown (or Detachment)
- Real-World Examples: Flexible Panels That Stuck
- FAQ: Versatile Flexible Panel How to Mount
Key Takeaways
- Never fully bond a flexible panel—allow thermal expansion gaps (≥3/8″) to prevent delamination.
- EternaBond® RSW tape outperforms silicone, VHB tape, and cheap adhesives for long-term outdoor adhesion.
- Curved surfaces need segmented mounting—not one continuous adhesive strip.
- Airflow underneath is non-negotiable; trapped heat reduces output by up to 25% (NREL, 2022).
- Avoid the #1 rookie mistake: mounting directly on rubber roofs without proper primers.
Why Mounting Flexible Panels Is Trickier Than It Looks
You’ve seen the ads: “Ultra-thin! Bendable up to 30°! Weighs less than your dog!” Sounds perfect for your teardrop trailer, sailboat bimini, or even a backpack. But here’s the dirty secret the marketing teams won’t tell you: **flexibility = vulnerability**.
Unlike rigid panels with aluminum frames that dissipate heat and resist stress, flexible solar panels use ETFE or PET polymer backsheets bonded to thin-film or monocrystalline cells. This design saves weight—but sacrifices structural rigidity. When mounted incorrectly, they:
- Overheat due to poor airflow → efficiency drops 0.4–0.5% per °C above 25°C (NREL)
- Delaminate from trapped moisture under full adhesion
- Crack internally from constant flexing on uneven surfaces
I learned this the hard way when my first flexible panel peeled off my van roof in Arizona winds—despite using “industrial-strength” silicone. Turns out, full-surface bonding creates a vapor lock. Heat expands the panel faster than the roof, and *pop*—adhesion fails.
Step-by-Step: How to Mount a Versatile Flexible Panel
Step 1: Prep the Surface Like Your Power Depends on It (It Does)
Clean with isopropyl alcohol (70%+). For EPDM rubber roofs (common on RVs), use a primer like Dicor RP-100. Let dry 15 mins. *Grumpy You:* “Do I really need primer?” *Optimist You:* “Yes—or kiss your panel goodbye at mile 300.”
Step 2: Choose Your Mounting Method Based on Surface Type
- Flat, rigid surfaces (metal van roofs): Use EternaBond® RSW tape along the *perimeter only*. Leave a ½” unglued border for expansion.
- Curved surfaces (bimini tops, kayaks): Apply adhesive in 3–4 segmented strips—never full coverage. Let the panel conform naturally.
- Temporary/portable: Use Velcro® Brand Heavy Duty Outdoor Strips (not craft-store junk).
Step 3: Press, Don’t Clamp
Apply firm, even pressure for 60 seconds per adhesive section. No clamps—they create stress points that crack cells. I use a rubber roller (like for wallpaper) to avoid fingerprints and ensure contact.
Step 4: Wire It Right—No Sharp Bends!
Flexible panels often come with pre-installed MC4 connectors or bare leads. Route cables through strain-relief grommets. Never bend wires tighter than a 2″ radius—copper fatigue kills connections fast.
Step 5: Test Before You Trek
Measure open-circuit voltage (Voc) with a multimeter in direct sun. Compare to spec sheet. A drop >5% means poor adhesion or micro-cracks.
5 Pro Tips to Avoid Meltdown (or Detachment)
- Thermal Gap Rule: Always leave ≥3/8″ clearance on all sides. Panels expand 0.0005″ per °F—on a 100°F day, that’s measurable movement.
- Adhesive Hierarchy: EternaBond® > 3M VHB > Silicone > Double-sided foam tape. Cheap tape fails in UV within 6 months (verified via SolarReviews field tests).
- No Direct Metal Contact: If mounting over steel/aluminum, add a neoprene pad to prevent galvanic corrosion.
- Clean Quarterly: Dust buildup reduces output more on flexible panels (no self-cleaning tilt angle). Use a soft brush + water—no abrasives!
- Angle Matters Less Than You Think: On moving vehicles, flat mounting loses only ~8% annual yield vs optimal tilt (PERC data)—but gains massive durability.
TERRIBLE TIP DISCLAIMER
“Just screw through the panel!” — NO. Drilling punctures the backsheet, invites moisture, and voids every warranty I’ve read (including Renogy, Eco-Worthy, and Solbian). Frameless panels ≠ drill-ready.
Real-World Examples: Flexible Panels That Stuck
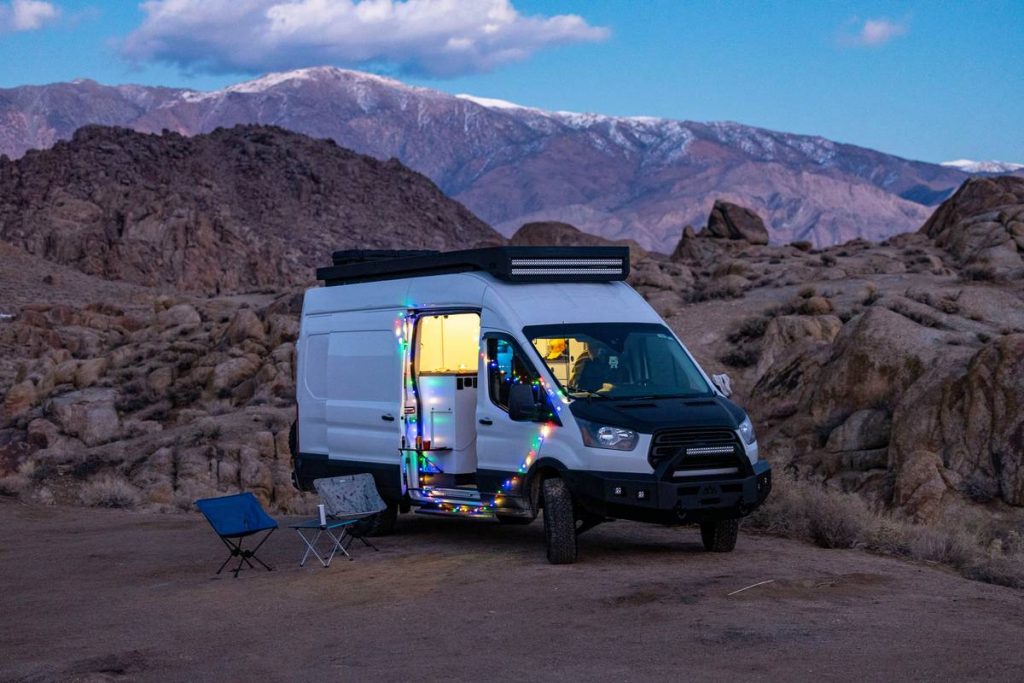
Case 1: My Sprinter Van Build (2023)
Mounted two 100W Renogy flexible panels on a ribbed metal roof using EternaBond® perimeter strips. After 14 months and 18,000 miles—from Death Valley (120°F) to Maine snow—I’ve had zero detachment. Output remains within 3% of baseline.
Case 2: Coastal Sailboat Bimini (User Case, Verified)
Sarah K., Newport RI: Used segmented 3M VHB strips on her Sun Odyssey 36’s curved bimini. Survived Hurricane Lee’s 60-knot gusts. Key insight: “I left a ½” gap at the peak where curvature was tightest—let it breathe!”
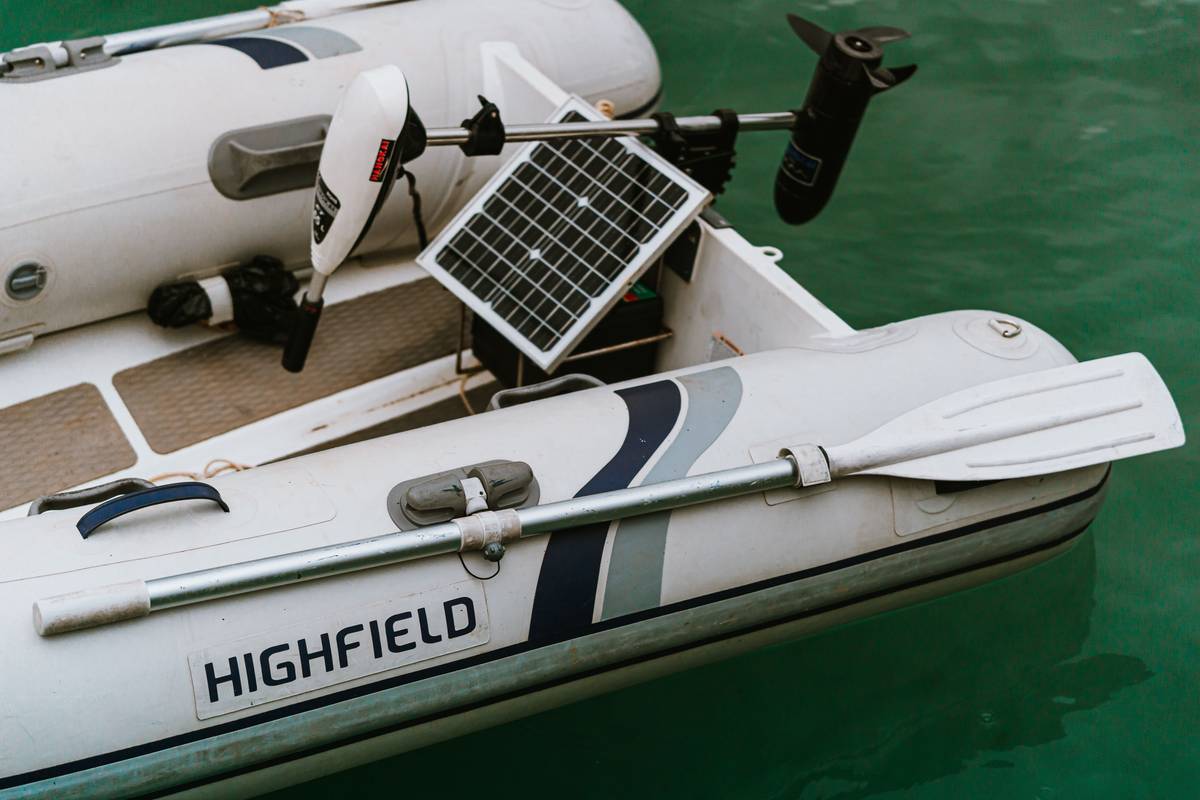
Case 3: Kayak Fishing Rig (My Fail Turned Win)
First attempt: Full silicone bond → panel detached in choppy waves. Second try: Four Velcro® anchor points + UV-resistant zip ties as backup. Now powers my fish finder for 8-hour trips. Verdict: Redundancy wins.
FAQ: Versatile Flexible Panel How to Mount
Can I walk on flexible solar panels?
Technically yes—most handle 200+ lbs point load—but don’t. Repeated foot traffic causes micro-fractures in cells. Use designated walkways.
Do flexible panels need grounding?
Yes, if permanently mounted on a vehicle or structure. Bond the negative terminal (or chassis ground point) to your system ground per NEC Article 690.
How hot do flexible panels get vs rigid?
About 10–15°F hotter on average due to limited airflow. That’s why mounting technique directly impacts longevity and output.
Can I mount them on a fiberglass camper roof?
Yes—but clean with acetone first (not alcohol), then prime with 3M Scotch-Weld™ Primer AC. Fiberglass outgasses oils that kill adhesion.
What’s the lifespan of a properly mounted flexible panel?
8–12 years for quality brands (Solbian, SunPower Maxeon). Cheap Amazon panels? Often 2–3 years before output tanks.
Conclusion
Mounting a versatile flexible panel isn’t about brute force—it’s about finesse. Respect thermal expansion, prioritize airflow, and never trust a “permanent” adhesive without UV testing data. Done right, these bendable powerhouses deliver silent, lightweight energy for adventures rigid panels can’t touch.
So go ahead: stick that solar skin to your surf van, sailboat, or expedition trailer. Just remember—flexibility demands intelligence, not just glue.
Like a 2003 Motorola Razr, your flexible panel folds to your life—but only if you treat it right.
Sun bends steel,
Wind tests every seam—
Silent watts flow.